

On a winter morning, in the dark, in front of my car and all the windows are frozen over. The warm smart home, with the lights that automatically turn on as I move through the rooms, just goes dark again and does not care. But I do! Even more so, as I free the windshield from the ice with stiff cold hands.
If the light that greets me in the hallway when I get up had not only been of a morning-friendly brightness, but in a color that is adapted to the outside temperature, the warning would have registered. The fact that it’s going to take a little longer today and that I’d better bring my gloves would have been conveyed to me in an “enlightening” way. But the “intelligence” of the smart home is not enough for that.
The data is available. So are the interfaces to retrieve and receive that data. But how do these two ends find each other?
Digitalization everywhere
Smart home installations that work on a ZigBee wireless network can be found in more and more homes. Even IKEA offers a cost-effective solution by the name of Trådfri. The situation is no different in many companies. The number of sensors and actuators is constantly increasing, yet the hurdle of digitalization is not getting any smaller.
Our small Maker project shows how a platform designed for SMEs’ digitalization can help us with this problem in home automation and why even such seemingly small problems can show how digitalization can proceed in the industry.
Become smarter
To make the light smarter, a Rasperry Pi, a ZigBee gateway, and a No-Code platform can be used to help. An experimental setup consisting of a Dataflow in the titan platform, a gateway for light control and a lamp shall exemplify what can be done with data. So my colleague and I set to work.
ZigBee Gateway
Hardware ingredients:
- RasperryPi
- RaspBee II
- Smart light source e.g.: Müller Licht – tint White & Color or IKEA Trådfri
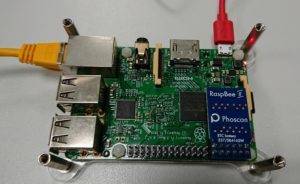
When setting up the smart home, it is just like in the industry when choosing the control system. You can bind yourself to a manufacturer such as Philips Hue or Osram Lightify. But then you are also bound to the whims of this manufacturer. So the choice fell on the more open gateway from Dresden Elektronik. More so, because it offers a well-documented, open source REST API (https://github.com/dresden-elektronik/deconz-rest-plugin).
Software ingredients:
- deCONZ
- deCONZ REST Plugin
The setup of the gateway and also the installation of the necessary software are thankfully simple. At this point, it is important to follow the detailed documentation on the manufacturer’s website. The first lamp can then be taught in the deCONZ GUI or via the Phoscon APP. If you don’t want to have the GUI open all the time, so that the REST interface is available, you can run it in headless mode, but then you can’t use the deCONZ GUI anymore. For debugging and similar purposes, you then have to switch back and forth a bit. On the command line the corresponding service has to be set to enabled and started.
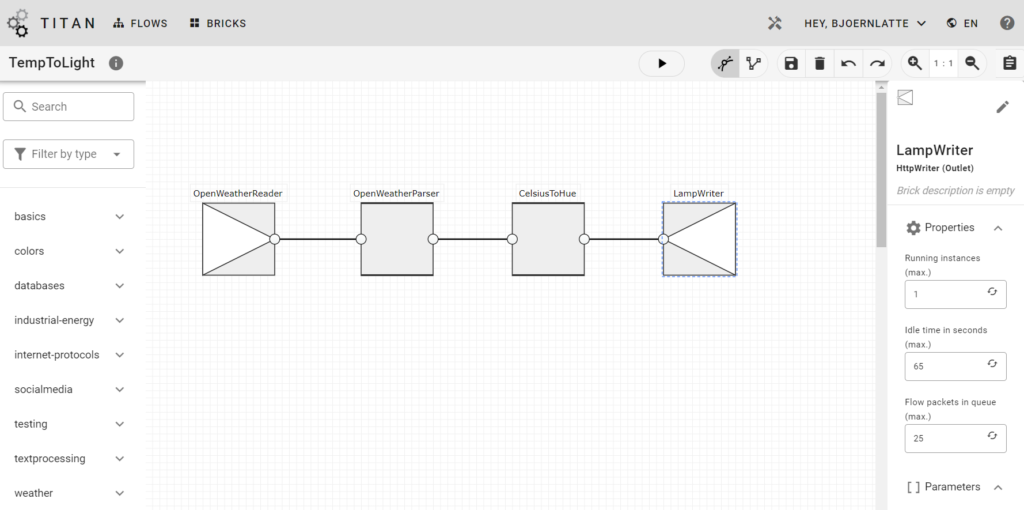
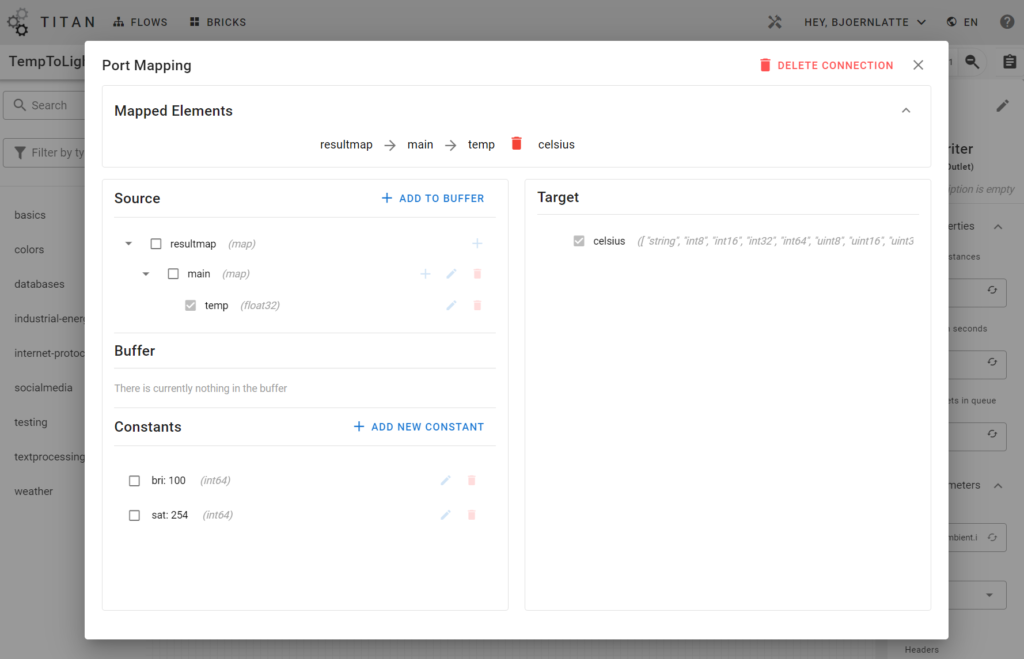
We have the starting point. Now we only need to get a color out of it, with which the lamp can be fed. The HTTPClient returns the entire body, from which we then extract only the required data. The JSONParser first converts the universal textual result into a key-value map which the titan platform understands better. The map’s content, or better the part we are interested in, is defined by the port mapping of the output port. The JSON received from OpenWeather contains the key main and in it the desired temperature. For this, we add to the resultmap an element main of type map and below it the element temp of type float32. The port mapping does the rest for us when we map the temp field to the next Brick’s celsius field.
The temperature becomes color. This is a special calculation task for which we have not found a generic Brick in titan yet. So a little bit of programming has to be done. A new Brick package is needed to implement the TemperatureToHUE Brick. The tutorial “How To Write a Brick” and the template for Brick packages help to create it. Following the platform’s open source idea, we will make the new package available as a repository. The next ones, who face a similar task like us, will have the Brick available right away or at least just have to upload the corresponding package to their instance.
To make the light glow in a deep blue when it’s cold outside in winter and red in summer, we first create a linear gradient from the HLS color wheel. Then, using the current temperature, we later determine the hue to display from this gradient. Once our new Brick is uploaded to the platform, the port mapping on the Brick’s input and output is done.
Ready for the next level
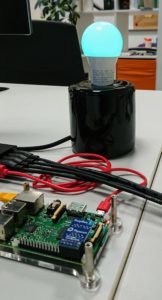
The next cold day will come, on which I am now warned in time that ice scraping is necessary. More ideas about what else can be done with data from the Internet and data flow programming are sure to come. The excursion into home automation showed how easy digitalization can be achieved. The platform, bricks, and flows will enable us to tackle it in an iterative and simple way. Most of the tasks were solvable with general building blocks. It is only necessary to start programming where very specific things are needed.
This is transferable to the industrial sector. There’s a wealth of data that is just waiting to be put into the right form and transferred to the endpoints that are also already available. Starting small and then continuously expanding and adapting a data flow to the circumstances, instead of a large solution all at once, seems completely natural.